
Scheduled Action
Scheduled Actions in D3E Studio allow developers to automate tasks or events based on specified schedules. These actions can be triggered at predefined times or intervals, enhancing the flexibility and efficiency of data-driven processes. This documentation provides a comprehensive guide to understanding and configuring Scheduled Actions in D3E Studio.
This mechanism enables developers to coordinate the execution of data-driven tasks, such as updating visualizations, handling data events, refreshing content, sending notifications, or performing periodic maintenance, based on temporal conditions. Scheduled Actions provide powerful automation capabilities that help keep your application running smoothly and efficiently.
AI-Powered Scheduled Action Generation
D3E Studio AI can automatically generate Scheduled Actions for your application:
- Automatic Action Creation: AI analyzes your project requirements and generates Scheduled Actions when periodic tasks are needed
- Schedule Configuration: Automatically configures appropriate schedule types (Fixed Rate, Fixed Delay, Cron, or User Defined)
- Time Zone Setup: Sets up proper time zones for accurate scheduling
- Task Automation: Generates actions for common periodic tasks like data cleanup, report generation, notifications, and data synchronization
- Best Practices: Follows D3E conventions and scheduling best practices automatically
When using D3E Studio AI, describe your automation needs and the AI will generate complete Scheduled Action configurations.
Key Features
Name:
- Every scheduled action is uniquely identified by a name within the API.
Description
- Here you can give a detailed and informative explanation or representation of Scheduled Action. It is a narrative that provides additional information to help understand, identify, or explain about the scheduled action.
Documentation
- Allows users to document and store information about specific Scheduled Action in the project. Write notes, explanations, or guidelines related to Scheduled Action. Facilitates collaboration by providing a shared space for notes and documentation.
Type:
The "Type" property determines when the scheduled action should run. There are four types available:
1. Fixed Rate: Executes the action at regular intervals.
2. Fixed Delay: Executes the action with a delay between consecutive executions.
- Delay (for Fixed Rate/Fixed Delay): For Fixed Rate and Fixed Delay types, specify the delay in milliseconds between consecutive executions.
3. Cron: Executes the action based on a cron expression.
- Cron Expression (for Cron Type): For the Cron type, enter the cron expression that defines the schedule for executing the action.
4. User Defined: Allows users to define custom conditions for executing the action.
- User Defined (for User Defined Type): Select a model and define an expression for the conditions under which the action should run. Choose whether it should run once or always.
Time Zone:
- Specify the time zone for the scheduled action to ensure accurate execution based on the specified schedule.
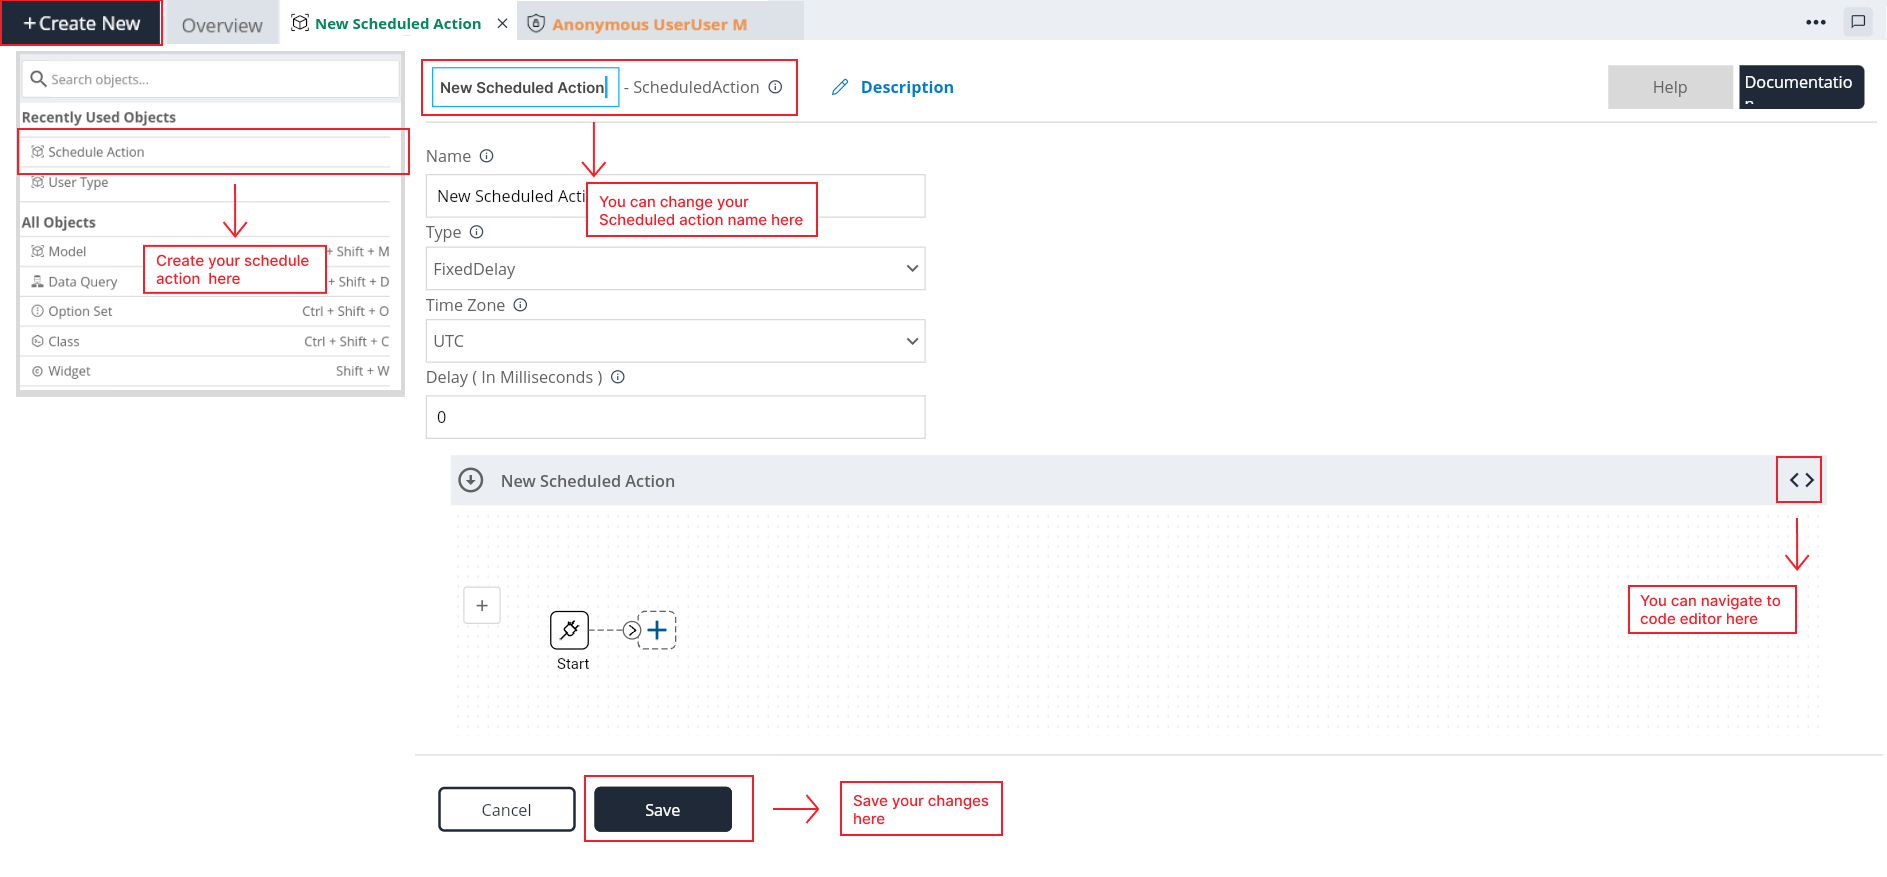
Creating a Scheduled Action
Follow these steps to create a Scheduled Action:
Step 1: Select Scheduled Action in "Create New" button.
Step 2: Give the scheduled action name as you want.
Step 3: Add a description about Sheduled action(optional).
Step 4: In the Scheduled Action configuration, choose the type based on your scheduling requirements.
Step 5: Configure the properties based on the selected type (Delay, Cron Expression, Model & Condition).
Step 6: Specify the time zone for accurate scheduling.
Step 7: Save the Scheduled Action configuration and Check whether Sheduled action is saved or not in the Sheduled action list in the Explore tree.
Managing Scheduled Actions
Once a Scheduled Action is created, you can manage and customize it as needed:
Edit Scheduled Action:
- Modify the configuration of an existing Scheduled Action by clicking on the scheduled action name in the explorer tree.
Delete Scheduled Action:
- Remove a Scheduled Action that is no longer required.
Conclusion
Scheduled Actions in D3E Studio offer a powerful mechanism to automate tasks based on temporal conditions. By providing different types and configuration options, developers can implement precise schedules for executing actions, improving the overall efficiency of data-driven processes. This documentation serves as a guide to help you leverage the capabilities of Scheduled Actions in your D3E Studio projects.